
Guides
Cat Cross Stitch Pattern From Your Own Photo
A custom cat cross stitch pattern from your photo: getting the eyes and pupils right, adding whiskers in backstitch, sizing the chart and picking colors.

By Antoine Duno
Updated September 25, 202611 min read
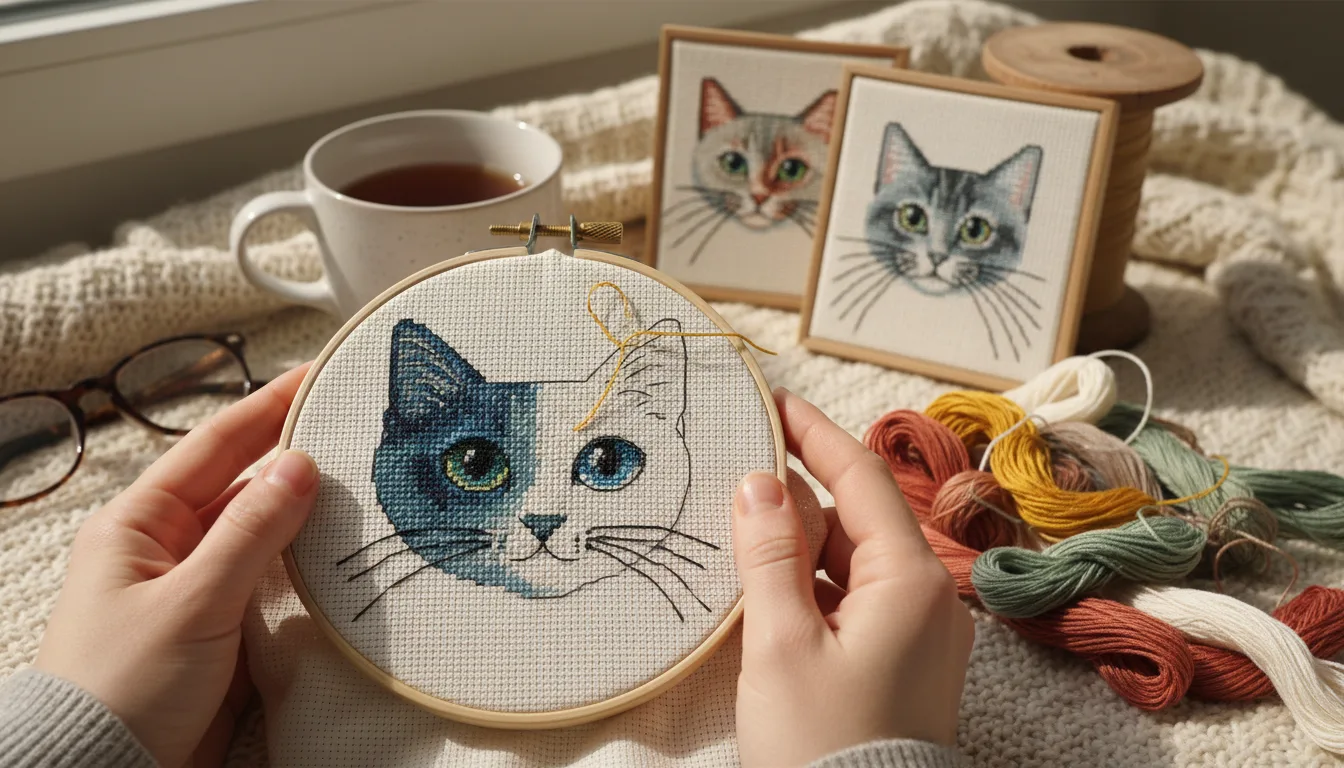
A cat portrait lives or dies on two things that are smaller than a single stitch in most photos: the pupils and the whiskers. Get the eyes clear and add a few well-placed whiskers, and a fairly simple chart looks like your cat. Miss them, and a beautifully stitched coat looks like any cat.
This guide covers what's different about charting a cat from a photo: choosing a photo where the eyes will survive, sizing the chart around a cat's small face, and the stitch-level fix for whiskers, which a chart of whole stitches can't make for you.
What makes cats different from dogs
Most pet portrait advice applies to both, and cross stitching a pet portrait from a photo covers it. Cats add a few specific problems.
| Feature | Why it matters in a chart | The fix |
|---|---|---|
| Eyes that change with light | Pupils narrow in bright light and widen in dim light, changing how much iris color shows | Choose a photo in moderate daylight |
| Reflective eyes | Flash bounces off the back of the eye and becomes a glowing, flat eye in the chart | No flash; natural light at eye level |
| Whiskers | Finer than one stitch, so they break up or vanish when converted | Add them by hand in backstitch |
| A small face on a long body | A whole-cat photo leaves few stitches for the face | Crop to the head |
| Coat patterns | Tabby stripes, tortoiseshell and calico patches are the likeness | Enough colors and stitches to keep them |
Choosing the photo
Daylight, no flash, eye level
Cats have a reflective layer behind the retina, the tapetum lucidum. The Animal Medical Center in New York explains that in low light, where cameras fire the flash, a cat's pupils dilate and the tapetum reflects the flash back into the lens, giving the familiar glowing eyes. Its advice for photographing cats is to use natural light, turn the flash off, and take photos at your pet's eye level to cut glare from overhead lights.
That advice matters more for a chart than for a phone photo. A glowing eye becomes a patch of flat yellow-green or red stitches with no pupil at all.
Pupils: the size you want
The Merck Veterinary Manual explains that the pupil enlarges when it's dark and gets smaller when it's bright. A cat's pupils are vertical slits that, as the Animal Medical Center notes, can close further than round pupils.
For a chart, both extremes cause trouble:
- In bright sun, the pupil may be a slit narrower than one stitch. The chart either loses it, giving an eye with no pupil, or shows a single dark column that looks harsher than the real thing.
- In dim light, the pupil fills most of the eye. The chart shows a dark disc with a thin ring of color, and the iris color, often the most recognizable thing about a cat, nearly disappears.
The frame you want is in between: bright, indirect daylight, such as a room with a window, where the pupil is clearly there and the iris color is clearly visible around it.
Other things to check in the photo
- Both eyes sharp. Use burst mode; cats blink and turn at the worst moment.
- The third eyelid. Merck describes a whitish pink third eyelid in the inside corner of the eye. If it's showing in a photo, a chart turns it into a pale smudge in the corner of the eye. Choose a frame where it isn't visible.
- The head filling the frame. A cat curled on a sofa across a whole photo leaves very few stitches for the face.
- A background that contrasts with the coat, so the ears and cheek outline read clearly.
- Whiskers visible against something. Pale whiskers against a pale wall won't show in the photo, and you'll be placing them from memory.
If your cat will only sit still in one spot, work with it: open the curtains, turn off the overhead light, and get down to their level. Crop a photo for cross stitch explains how to frame the head once you have the shot.
Sizing the chart around a small face
A cat's head is small compared with its body, and the eyes are the part that needs the stitches. Crop to the head and shoulders, then size the chart.
Finished size is stitches divided by fabric count, since DMC defines count as the number of stitches you can make in an inch. DMC recommends a clear border of at least 8 cm / 3 inches around the design, which adds 6 inches to each fabric dimension.
| Chart size | Total stitches | Finished on 14-count | Fabric to cut | Suits |
|---|---|---|---|---|
| 60 × 60 | 3,600 | 4.3 × 4.3 in | 10.3 × 10.3 in | A simple head or silhouette, an ornament |
| 100 × 100 | 10,000 | 7.1 × 7.1 in | 13.1 × 13.1 in | A head portrait with clear eyes |
| 120 × 150 | 18,000 | 8.6 × 10.7 in | 14.6 × 16.7 in | Head and shoulders, room for whiskers |
| 150 × 150 | 22,500 | 10.7 × 10.7 in | 16.7 × 16.7 in | Detailed coat patterns, long-haired cats |
The test that matters: zoom into the preview and count the stitches across one eye. If it's two or three, crop tighter or raise the stitch count. If you want something small, mini pet portrait cross stitch covers charts that still read at a small size.
Whiskers need room too. They extend well beyond the face, so a chart cropped tight at the cheeks has nowhere to put them. Leave some fabric either side of the muzzle if you plan to add them.
Getting the eyes right in the preview
Zoom right in and check each of these against the photo:
- The pupil is there, and it's the right shape: a slit, an oval or a round disc, depending on the light in the photo.
- The iris keeps its color. A green or gold eye that came out gray or brown usually means too few colors. Try a higher color count and compare.
- The catchlight survived. The small pale reflection in each eye may be a single stitch. It's the most important stitch in the chart, and the default Tidy up: Light erases a one-stitch highlight. If it vanished, set Tidy up to Off, as pet portrait tips explains.
- A dark rim around the iris is visible, if the photo has one. When it merges with the pupil, the eye looks flat.
- The two eyes aren't identical. If one catches more light in the photo, leave it that way. Symmetrical eyes look like a cartoon.
If an eye is nearly right but not quite, you can fix it on the chart by hand before stitching: mark the one stitch that should be the catchlight, or the column that should be the pupil. A few changed stitches in the eye matter more than hundreds elsewhere.
Whiskers: the stitch-level fix
VCA Animal Hospitals describes whiskers as coarser and thicker than regular hair, located above the eyes, on the chin, near the ears, on the forelegs and above the upper lip, and says most cats have 12 arranged in four rows on each cheek. Even so, a whisker in a photo is far thinner than one stitch in a chart.
That's why a photo conversion on its own rarely gets whiskers right. A chart of full cross stitches can only choose whole stitches, so a whisker comes out as a broken dotted line of pale stitches across the muzzle and background, or disappears. Neither looks like a whisker.
How to add them
- Remove the broken whisker stitches from the chart, replacing them with the fur or background color around them. Mark the changes on your printed chart.
- Choose a few whiskers, not all of them. The longest two or three on each side usually carry the likeness. Stitching every one clutters the muzzle.
- Draw them on the chart first in pencil, following the photo's curve, from the whisker pad outward.
- Stitch them last. DMC advises adding backstitch after the cross stitches are finished, because backstitch can overlap stitched areas.
- Use one strand for a fine line, as DMC suggests for fine outlines, and keep each stitch length consistent.
- Follow the curve with short stitches. Long straight stitches make a whisker look stiff; several short ones can bend slightly.
Whisker color
Match the photo, then look at what the whisker crosses. A white whisker reads well over a dark coat but vanishes where it runs onto cream or white fabric. A dark whisker on a pale cat has the opposite problem. You can change color where the whisker leaves the fur, or simply end the line at the edge of the coat.
If you're unsure, stitch the portrait, then try the whiskers on one side only and step back. It's easy to add more and tedious to unpick them.
The eyebrow whiskers above the eyes are worth considering too. One or two fine lines there can lift the whole expression.
Coats and colors
Cats' coats range from a single flat color to complex patterns, and each needs something different from the palette.
- Tabby, tortoiseshell and calico. The stripes and patches are how people recognize their cat, so the chart needs enough colors and stitches to keep them where they are. Tabby cat cross stitch covers stripes, tortoiseshell and calico in detail.
- Black cats. A black coat needs several near-blacks rather than one flat black, and a photo with some light on the fur. Stitching a black dog or cat without a silhouette explains both.
- White and cream cats. Pale fur overexposes easily, and white stitches disappear on white fabric. See white dog or cat cross stitch.
- Long-haired cats. More shades to describe the flow of the fur, and a background that contrasts with the outline.
To set the color count, generate the same crop at two or three counts and choose the lowest where the coat pattern and the eye color both hold. How many colors a photo pattern should use goes through that comparison. Each color costs at least one skein of DMC floss, sold in 8.7 yard / 8 meter skeins.
Remember the whisker color too. If it isn't already in the key, it's one more skein.
Backgrounds and fabric
Leave the background unstitched if you can. It saves hours, and a fabric color that suits the coat does the work: a soft gray behind a ginger cat, cream behind a gray one. Think about the whiskers when you choose, since they cross onto the background and need to show against it.
Before you start stitching
- Print the photo and keep it next to the chart. When two shades look alike on paper, the photo tells you which is which.
- Start from the center of the chart and the fabric, as DMC recommends.
- Stitch the eyes early, once you've counted to them from the center. If they go wrong, you'll know before hours of coat.
- Leave the whiskers for last, as above.
Have a dog too? Dog cross stitch pattern from a photo goes coat by coat. When you have the photo, upload it and zoom into the eyes before you change anything else.
Frequently asked questions
Can I make a cross stitch pattern from a photo of my cat?
Yes. Choose a daylight photo taken at your cat's eye level without flash, crop so the head fills most of the frame, and size the chart so each eye is several stitches across. Then check the eyes and pupils in the preview, and plan to add whiskers by hand in backstitch.
How do I get my cat's eyes right in cross stitch?
Pick a photo where the iris color and the pupil both show clearly, and give each eye enough stitches. In bright light a cat's pupils narrow and in dim light they widen, so moderate daylight usually shows both. Keep the small pale catchlight stitch, which makes the eye look alive; the default Tidy up: Light erases a one-stitch catchlight, so set it to Off if the preview loses it.
How do I stitch cat whiskers in cross stitch?
In backstitch, after the cross stitches are done. DMC suggests a single strand for fine outlines. Whiskers are finer than one stitch, so a photo chart usually shows them as broken pale stitches or not at all. Stitch a few of the longest ones as smooth lines rather than every whisker.
Why does my cat have glowing eyes in the pattern?
The photo was taken with flash. Cats have a reflective layer behind the retina, and a flash in dim light bounces off it, which the chart then stitches as a flat bright eye. Use natural light with the flash turned off, or correct the eye color in a photo editor first.
What size should a cat cross stitch portrait be?
Big enough that each eye is several stitches across. A head portrait often works around 100 to 150 stitches on the longer side, about 7.1 to 10.7 inches on 14-count Aida. Cat faces are small relative to the body, so crop to the head rather than charting the whole cat.
What color whiskers should I use?
Match the whiskers in the photo, then check them against what they cross. Pale whiskers read well over dark fur but vanish over pale unstitched fabric; dark whiskers do the opposite. Where a whisker runs past the fur onto the background, you may need to change color or stop the line at the fur's edge.
Sources
- The Animal Medical Center — Why does my cat have devil eyes whenever I photograph her? (tapetum lucidum, flash, eye level)
- The Animal Medical Center — Why cats have slit pupils (greater constriction than round pupils)
- Merck Veterinary Manual — Eye structure and function in cats (pupil in bright and dim light, third eyelid)
- VCA Animal Hospitals — Why do cats have whiskers? (locations, 12 in four rows per cheek)
- DMC — Use back stitch to accentuate your cross stitch (single strand, add after cross stitches)
- DMC — What fabric should I use? (count is the number of stitches per inch)
- DMC — How to prepare your fabric (border of at least 8 cm / 3 inches)
- DMC — How to begin cross stitch (start in the middle)
- DMC — Cotton Embroidery Floss (Mouliné Spécial): 8.7 yard / 8 meter skeins
Keep stitching
 Guides
Cross Stitching a Pet Portrait From a Photo
Choosing the photo, getting the eyes right, handling fur and backgrounds, sizing the chart, and how long a pet portrait cross stitch really takes.
Read · 13 min Technique
Stitching a Black Dog or Cat Without a Silhouette
Black fur defeats most converters. How to photograph a black pet, and how to build depth with several near-blacks instead of one flat black.
Read · 13 min Guides
Dog Cross Stitch Pattern From a Photo: Coat by Coat
Make a custom dog cross stitch pattern from your photo: what smooth, long, curly, wiry, merle, black and white coats each need in colors, size and light.
Read · 12 min Guides
Cross Stitch Pattern Generators Compared: 2026 Prices
Pic2Pat, Stitchmate, Stitch Fiddle, StitchFromPhoto, Cross Stitched and more, compared on price and on what the PDF contains. Prices as of September 2026.
Read · 14 min Guides
Cross Stitch Gifts From Photos: Ideas and Start Dates
Photo cross stitch gift ideas by occasion, with the arithmetic to work out when to start: chart size, your stitching pace, hours a week and finishing time.
Read · 15 min Guides
Pattern Keeper Compatible Patterns: What the PDF Needs
What makes a PDF chart work in Pattern Keeper: text symbols, a readable key, clean pages and overlap, from the app's own help pages. Plus a 2-minute test.
Read · 10 min