
Guides
Cross Stitch Ornament Finishing: 4 Simple Methods
Four ways to finish a cross stitch ornament: flat felt back, stuffed pillow, padded board or ready-made frame, plus washing, trimming and hanging.

By Antoine Duno
Updated October 26, 202610 min read
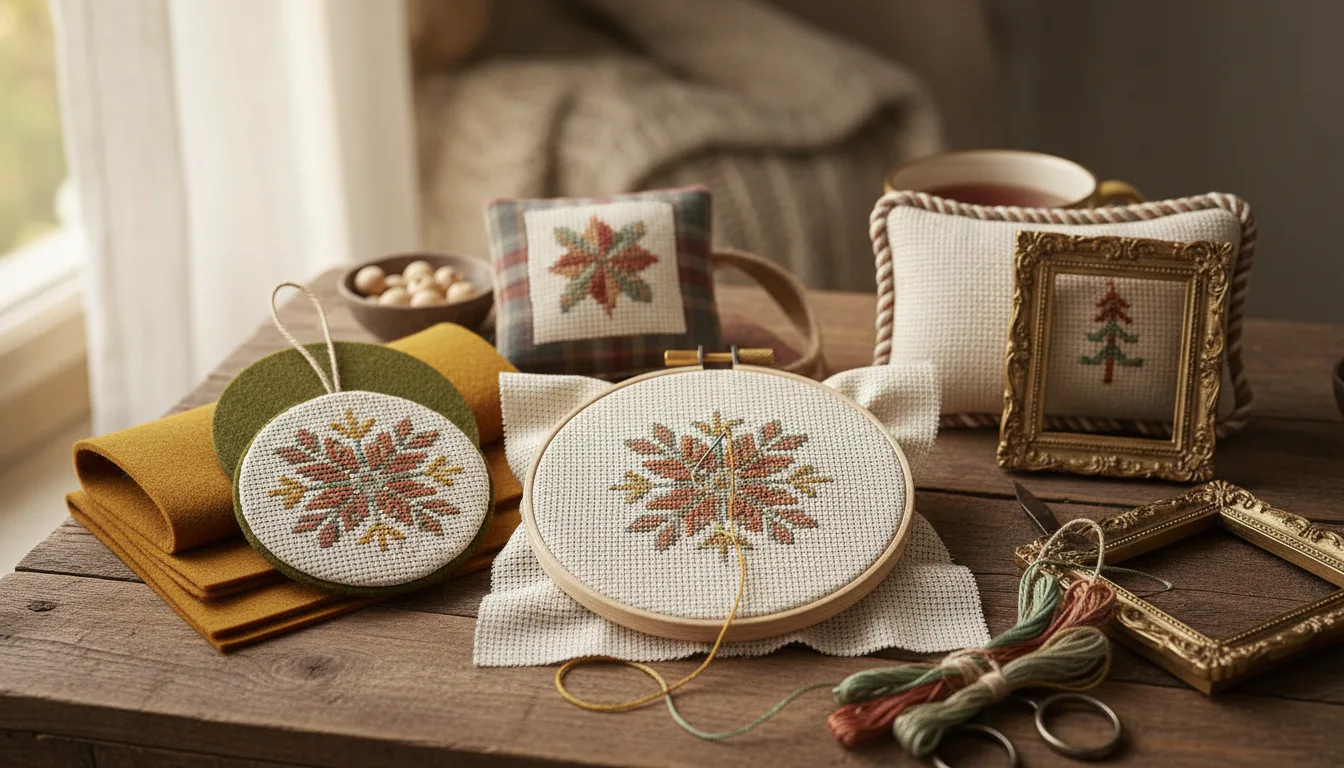
The stitching is done, the tree is going up in a few weeks, and a square of Aida is not yet an ornament. Finishing is the part that turns it into something that hangs straight, survives being packed in a box every January, and looks like it was meant to be a gift.
None of the four methods below needs a sewing machine. They differ in how long they take, how sturdy the result is, and how much of the design they show. Pick by who will handle it: a toddler's tree, a grandparent's keepsake box, a gift tag on a present.
The four methods at a glance
| Method | Best for | Effort | What you need | Survives handling |
|---|---|---|---|---|
| Flat felt back | Small, simple shapes; gift tags | Low | Felt, floss, ribbon | Moderate; can bend |
| Stuffed pillow | Soft ornaments; children's trees | Moderate | Backing fabric, stuffing, ribbon | Good |
| Padded board | Photo and portrait ornaments that must stay flat | Moderate | Card or board, thin wadding, felt, ribbon | Very good |
| Ready-made frame or mini hoop | Last-minute gifts | Lowest | The frame or hoop | Depends on the frame |
The general finishing order, check, test, wash, dry, press, then finish, is the same for every method and is set out in how to finish cross stitch. Here's the short version for ornaments.
Before you start: wash, press, plan the edge
Test the reds, then wash
Christmas designs are full of strong reds and greens, which is exactly where a bleeding thread does the most damage. The Cross Stitch Guild's test: place the work face down and press the back of the stitches with a clean, damp white tissue. Any trace of color on the tissue means the colors aren't fast, so don't wash. The Guild specifically advises extra caution with Christmas reds.
If the test is clean, DMC's method for washing finished needlework is:
- Rinse under cold running water, then hand wash gently with a small amount of non-biological detergent.
- Rinse several times in cold water until it runs clear; stop if the water becomes colored.
- Roll between two clean towels and squeeze gently, without wringing.
- Lay flat on a dry towel until just damp.
- Press face down between two clean towels with a warm iron. DMC says never to use a hot iron.
Let it dry completely before you cut or sew anything. Damp fabric stretches when you trim it.
Mark the finished edge
Decide the ornament's final shape before you cut, and mark it on the fabric with a washable marker or a line of basting stitches:
- Keep a gap between the design and the edge. Every method loses a little at the edge, to a seam, a wrap or a frame's lip. An ear or a letter right against the line will disappear.
- Center it by counting, not by eye. Count the unstitched squares from the design to your line on each side.
- For a circle, draw around a glass, lid or the frame's backing plate, centered on the design.
If you haven't stitched yet, plan the size and shape now. A photo Christmas ornament cross stitch covers chart sizes that still read at ornament scale; as arithmetic, a 60-stitch-wide design is about 4.3 inches on 14-count Aida and 3.3 inches on 18-count.
Method 1: Flat felt back
The quickest sewn finish, and a good first one to try. Felt doesn't fray, so it needs no hem.
- Trim the stitched fabric to your marked shape, leaving a border of unstitched fabric beyond the design.
- Cut felt in the same shape, slightly larger, so a thin line of felt shows around the edge as a frame.
- Make the loop. Fold a length of narrow ribbon or twisted floss and pin its ends between the layers at the top center.
- Sew around the edge by hand, through both layers, with two or more strands of floss. A small, even overcast or blanket stitch looks deliberate. Stitch through the unstitched border, not through the design.
- Secure the loop with a few extra stitches as you pass it.
The catch: Aida is stiff but not rigid, and a flat felt ornament can curl or bend over time. For a small gift tag that's fine; for a portrait you want to keep, choose Method 3.
Method 2: Stuffed pillow ornament
A small cushion shape: soft, forgiving and hard to break, which makes it the right choice for a tree that children reach.
- Cut a backing from cotton, felt or a festive print, the same size as the trimmed stitching.
- Place them right sides together with the loop tucked between them, its cut ends at the top edge, so the loop sits outside once the ornament is turned.
- Sew around the edge, following your marked line just outside the design, and leave a gap along the bottom for turning.
- Clip the corners, or notch the curve on a round shape, so the seam lies flat when turned.
- Turn it right side out and push the corners out gently with something blunt.
- Stuff lightly. Overstuffing distorts the grid and bulges the design. The Cross Stitch Guild's instructions for a stuffed piece list kapok, raw silk, rice or polyester wadding as fillings; for a hanging ornament, a light fiber filling keeps it from weighing on the branch.
- Close the gap by hand with small stitches.
The raw Aida edges end up inside the seam, so fraying stops mattering. A cord or twisted floss sewn over the seam hides any uneven stitching. Cross stitch pillow finishing covers the same construction at cushion size.
Method 3: Padded board
The sturdiest finish, and the best one for a photo ornament. A portrait needs its grid to stay flat and square, and a board holds it that way through years of packing and unpacking.
- Cut two pieces of card or thin board to the finished shape: one for the front, one for the back.
- Cut thin wadding the same size as the front board. The Cross Stitch Guild's card-making method uses polyester wadding cut to the size of the aperture behind stitching for a softly padded look; the same idea works here.
- Trim the stitched fabric with a generous border, enough to wrap around to the back of the board.
- Center the design on the padded board, fold the border to the back, and secure it: lace across the back with strong thread, pulling opposite sides toward each other, or run a gathering stitch around a circle and draw it up.
- Cover the back board with felt or fabric.
- Place the loop at the top, then join the front and back boards by sewing around the edge with small stitches, or with a cord couched over the join.
Method 4: A ready-made frame or mini hoop
No sewing and nothing to measure except the opening. Craft shops sell small ornament frames and mini embroidery hoops in several shapes; check the opening against your design before you buy, not after.
- Frame with a window: center the design in the opening, trim to the backing plate, and close the frame. Put a thin layer of wadding behind the fabric if the frame allows it, so the stitching sits forward.
- Mini hoop: tighten the fabric evenly with the screw at the top, trim the excess behind to a small border, gather it with a running stitch, and cover the back with a circle of felt. The screw doubles as the hanging point. Cross stitch hoop finishing has the full method for hoops of any size.
DMC notes that leaving work in a hoop for a long time can cause creases that are difficult to remove. That warning is about working hoops; a display hoop is a finish, but press the piece before it goes in.
And a biscornu, for designs that aren't a picture
A biscornu is a stuffed, twisted cushion made from two squares, and it hangs well with a loop added. The Cross Stitch Guild's instructions join the squares by lining up each corner of one square with the middle of a side of the other, stuff it, and pull a button tight through the center of each side.
It's not for a photo ornament. The Guild points out that the interest is in the corners, not the center, because the button sits where the middle of the design would be. That's where a face would be. Use a biscornu for a pattern or a border, and one of the four methods above for a portrait.
Finishing touches
Hanging loops. Narrow ribbon, cord or a twisted length of floss in a color from the design. Catch the ends securely into the seam or the back, at the top center. Then test: hold the ornament by the loop and shake it gently.
Tassels. DMC's own tassel method uses a single skein of stranded floss, wrapped and tied, and gives the lengths to cut. A tassel at the bottom of a round or diamond ornament balances the loop at the top. Since it takes a whole skein, choose a color you have spare.
The back. An ornament gets turned over. Stitch a name and year on the backing felt or fabric before you assemble it, or write on a card inserted behind the backing. Lettering on the back leaves the front for the design. If you're personalizing larger pieces this season, a personalized Christmas stocking plans a name on a much bigger scale.
Sparkle. Add metallic stitches before you finish, not after; once a board or backing is in place, you can't reach the back of the fabric to secure a thread.
When to start finishing
Finishing isn't the quick part. For each ornament, allow:
- An evening to check the stitching, test, and wash.
- Drying time until just damp, then pressing, then drying completely.
- An evening per ornament to finish, more for Method 3.
If you're making several for a December exchange, finish them one at a time as they're stitched, not all in the last week. And if you're still choosing designs, start from a photo sized for the method you plan to use: a board finish wants a border around the design, and a mini hoop wants a design that fits inside the ring.
Frequently asked questions
What is the easiest way to finish a cross stitch ornament?
A flat felt back. Trim the stitched fabric to shape, cut a slightly larger piece of felt, place a hanging loop between the two, and sew around the edge by hand with floss. Felt doesn't fray, so it needs no hem, and the whole finish takes an evening with basic hand sewing.
Do I need to wash cross stitch before making an ornament?
Usually yes, if the piece has been handled for weeks. Test first by pressing a damp white tissue on the back of the stitches; if color transfers, the Cross Stitch Guild says don't wash, and it singles out Christmas reds for caution. Otherwise follow DMC's cold-water method and press face down between towels.
How do I stop Aida fraying on an ornament?
Keep the cut edge away from the stitching and enclose it. On a stuffed ornament the raw edge sits inside the seam; on a board finish it wraps to the back. On a flat felt finish, leave a border of unstitched fabric beyond the design and sew through it, so the stitches that hold it don't sit at the very edge.
Should I glue or sew a cross stitch ornament?
Sewing lasts longer and can be undone; glue is faster. Glue that touches the stitched fabric can't be taken out later, so for a keepsake such as a baby's first Christmas, lace or stitch the fabric to its board or backing and keep any glue to felt-on-card at the back.
What do I use to hang a cross stitch ornament?
A loop of narrow ribbon, cord or twisted floss, caught securely into the seam or the back at the top center. Test it before wrapping: hold the ornament by the loop and give it a gentle shake. A stuffed or board-backed ornament is heavier than it looks, and a loose loop is the usual failure.
Sources
- The Cross Stitch Guild — Cross stitch FAQs (damp tissue colorfastness test; caution with Christmas reds)
- The Cross Stitch Guild — Making biscornu (joining two squares corner to middle, fillings, buttons)
- The Cross Stitch Guild — Making your own cards (wadding behind the stitching, adhesive or tape)
- DMC — How to clean and wash finished needlework (cold water, towels, warm iron face down)
- DMC — How to use an embroidery hoop (creases from leaving work in the hoop)
- DMC — How to make tassels (one skein of stranded floss)
Keep stitching
 Guides
How to Finish Cross Stitch: Wash, Press, Frame, Sew
How to finish cross stitch in the right order: check, test for colorfastness, wash, press, then frame, hoop or sew it, with museum advice on framing.
Read · 13 min Guides
Photo Christmas Ornament Cross Stitch: Small Charts
Turn a pet or baby photo into a cross stitch Christmas ornament: chart sizes that still read, finished size by fabric count, lettering, sparkle and timing.
Read · 11 min Guides
How to Frame Cross Stitch: Lacing, Mounting, Glass
How to frame cross stitch so it lasts: sizing the board, lacing or stitching it on, spacers that keep it off the glass, UV glazing, and what never to use.
Read · 13 min Guides
Crop a Photo for Cross Stitch: 7 Framing Rules
How to crop a photo for a cross stitch pattern: give the subject the stitches, match the frame or hoop, check pixels, with stitch counts for common frames.
Read · 10 min Guides
Cross Stitch Skin Tones: Charting Faces From Photos
Why faces turn orange, grey, blotchy in photo cross stitch charts, how to fix the photo and palette, and how to check skin shades against real DMC thread.
Read · 12 min Guides
Christmas Cross Stitch Gift: When to Start by Size
When to start a Christmas cross stitch gift, by chart size: start-by dates worked back from December 25, 2026, and the largest chart you can still finish.
Read · 7 min