Guides
House Portrait Cross Stitch: A New Home Gift
How to make a house portrait cross stitch from a photo: the shot, the crop, straight lines, a calm sky, backstitch and lettering for a new home gift.

By Antoine Duno
Updated November 13, 202610 min read
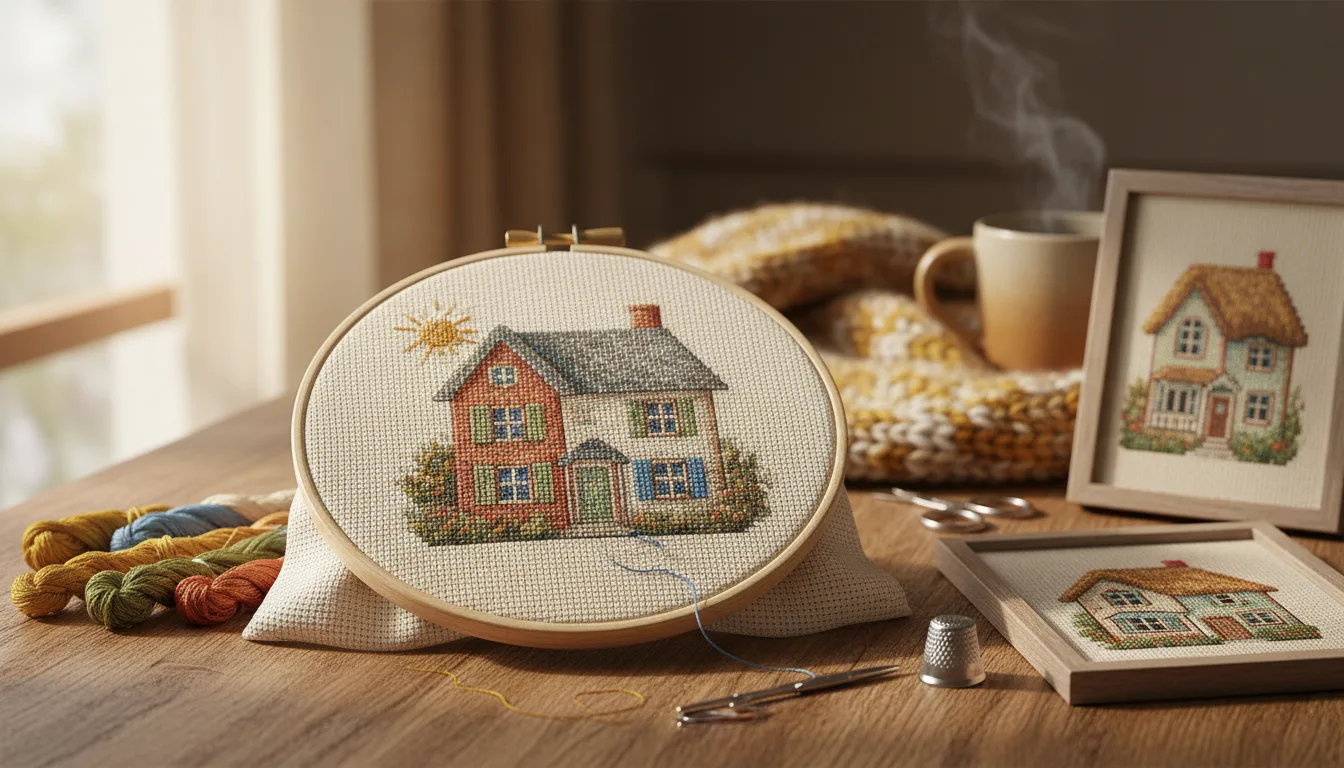
A house is one of the kindest subjects a photo cross stitch can have. It has no eyes to get wrong, no fur, and it holds still. It also has the one thing a stitch grid handles badly: long straight lines. Most of the work in a good house portrait is managing those lines and keeping the sky quiet, so the building reads cleanly from across a room.
This guide is for making one as a gift for a new home: for friends who've just bought, a family moving out of a house they loved, or clients at a closing.
What makes a house chart well
| Feature | How it charts in full cross stitches | What to do |
|---|---|---|
| Vertical walls, horizontal eaves | Clean lines, if level in the photo | Straighten the photo before cropping |
| Roof slope | A staircase of stitches | Accept it, or add a backstitch line |
| Windows | Clear blocks, if several stitches across | Make the chart wide enough |
| Window bars, gutters, railings | Usually thinner than a stitch, so lost | Backstitch them by hand |
| Brick and siding texture | Speckle, or nothing | Let it go; the color does the work |
| Sky | Stripes, or scattered stitches | Few colors, or leave it as bare fabric |
| Trees in front | Blotches that hide the house | Choose a photo or angle without them |
| House number, name, date | Too small to survive | Chart lettering by hand |
1. Take the photo for the chart, not for the listing
A listing photo is made to sell the house: wide lens, dramatic sky, taken from a corner so it looks bigger. A chart wants almost the opposite.
- Straight on to the front. A corner view shows two walls running away at angles, and every one of those lines becomes a staircase.
- From across the street, with the camera roughly level. Standing close and tilting the phone up makes the walls lean inward at the top.
- Flat daylight. An overcast day or the house in full shade gives even walls. Hard sun paints diagonal shadows across the front, and the chart will stitch them as solid color.
- Nothing in front. Cars, bins and a tree in leaf all become blocks of stitches that hide the door.
- Your own photo, or theirs. A listing photo usually belongs to the photographer who took it, and charting it makes a derivative work. Using photos for cross stitch: the copyright rules has the general picture. Taking your own from the sidewalk avoids the question.
If the house is far away or you can't get there, ask the new owners for a photo they took themselves, and ask for the original file rather than a copy sent through a chat app, which is usually smaller.
2. Straighten, then crop
A wall that leans half a degree in the photo becomes a line that steps sideways partway up the chart. Rotate the photo in your phone's editor until the corners of the house are vertical. If your editor has a perspective or skew tool, use it to stop the walls leaning in at the top; if it doesn't, the straight-on shot from step 1 does most of that job.
Then crop:
- The whole roofline, chimney included, with a little sky above.
- A strip of ground: the path, a front step, the bottom of the door. Cutting at the doorstep makes the house float.
- Not extra space for lettering. Anything inside the crop gets stitched, so a name or date goes in bare fabric below the chart. Plan for it when you cut the fabric instead.
- Not the whole garden. Lawn and hedges spend stitches and colors on things nobody will look at.
The crop sets the shape of the chart, and the shape sets the frame. Crop a photo for cross stitch covers matching a crop to a frame opening, and cross stitch frame sizes turns openings into stitch counts.
3. Size it by the windows
For a portrait the eyes set the minimum size. For a house it's the windows. A window has to be several stitches across before its frame and panes can show at all.
As arithmetic, for a house that fills the width of the chart and a window a tenth as wide as the house:
| Chart width | Stitches across the window | On 14-count | On 18-count |
|---|---|---|---|
| 70 stitches | 7 | 5.0 in | 3.9 in |
| 100 stitches | 10 | 7.1 in | 5.6 in |
| 150 stitches | 15 | 10.7 in | 8.3 in |
| 200 stitches | 20 | 14.3 in | 11.1 in |
Measure your own photo instead of trusting the tenth: the window's width divided by the house's width, times the chart width, gives its stitches. A narrow row house with big sash windows needs fewer stitches than a wide ranch house with small ones.
Finer detail is thinner still. As arithmetic, on a house 10 m wide charted at 150 stitches, each stitch covers about 6.7 cm of the real front. A window bar a few centimetres wide is well under one stitch, so the chart can't show it. That's not a fault in the chart, it's the grid, and it's why step 5 exists.
Size also sets the stitching time. How long does cross stitch take shows how to time your own pace, and it matters for a gift with a moving-in date attached.
4. Keep the colors and the sky calm
A house has large even areas: a wall, a roof, a door. Those want few colors. Too many close shades break a plain wall into scattered single stitches, and every one is a thread change.
Brick, render and a sky still need a handful of shades each, or they go flat. The practical approach is to start low and raise the color count until the walls and roof look like materials rather than paint swatches, then stop. How many colors a cross stitch pattern needs sets out that check in detail.
The sky is where charts go wrong most often. A smooth blue gradient has nowhere to go with a few colors, so it breaks into stripes. You have three options:
- A few sky shades and accept soft bands. Often fine, especially under a frame's glass.
- Leave the sky as bare fabric. A pale blue or cream fabric can stand in for the sky with no stitches at all. Colored Aida for cross stitch covers choosing one.
- Dithering, only for the sky. In our generator the dithering setting scatters single contrasting stitches to smooth banding. Its own hint says to use it only for a large smooth sky, because every scattered stitch is a thread change.
If you try leaving the sky bare with our background removal, know how it works: it takes out color from the edges of the photo inwards, so it suits an even sky but also reaches along the other edges into a street or lawn if they're similar. The preview shows what share of the photo it removed; check it covers the sky and nothing else. Removing the background from a cross stitch photo goes into the tolerance setting.
5. Add the lines the grid can't hold
Our charts are full cross stitches only: every square is one DMC color or bare fabric. That's the right base for a house, and it leaves a short list of details to add by hand once the crosses are done.
- Window bars and door panels, where they're thinner than a stitch.
- Gutters and the eaves line, if the roof and wall are close in color.
- A sloping roof edge, if its staircase bothers you.
- Railings, a gate, a fence.
The Cross Stitch Guild's guidance on backstitch fits architecture well: generally one strand and a slightly smaller needle for outlining, worked after all the cross stitching so the line isn't broken up, over individual blocks on Aida, avoiding long stitches unless you want a deliberately sketchy style. DMC adds that darker shades of the colors in the cross stitch give a subtler result than black, and that pulling backstitch too tight can pucker the fabric.
For a house, that means window bars in a shade from the window frame, not black, and a roof edge one shade darker than the roof. Draw every line on a spare printout of the color chart before you stitch. Backstitch in cross stitch covers planning lines on a full-cross chart, step by step.
Don't outline the whole house. A dark line around every edge turns a stitched photograph into a coloring book.
6. The name, number or date
A house gift nearly always wants words: the family name, the house number, "Est. 2026". Our generator doesn't make lettering, and text in a photo is almost never big enough to survive as stitches, so chart it separately.
- Chart the letters on graph paper, one square per stitch.
- Count the width and center it under the house.
- Use a color already in the key, often the door or roof color, so you don't buy another skein.
- Have someone read it back. A wrong house number is a small mistake that the owners will see every day.
Baby birth sampler cross stitch works through a layout of picture and lettering, and the same spacing ideas apply. For a first home as a wedding present, wedding cross stitch from a photo covers pairing a place with names and a date.
Before you pay: a preview checklist
Look at the free preview at arm's length, then close up:
- Are the walls vertical and the eaves level, with no step partway along?
- Can you count the windows, and do they have a visible frame?
- Is the door clearly a door?
- Is the sky calm: no hard stripes, no scatter of single stitches?
- Are the walls free of speckle?
- Is there room for the lettering below, and bare fabric around the design?
- Does the finished size fit the frame you plan to use?
If a line steps or a wall speckles, fix the photo or the settings rather than the stitching. Re-exporting a photo you've paid for is free, so there's no cost to getting it right.
Making it a gift
- Timing. New owners care about the house most in the first months. Time your pace on a 10 × 10 block, divide the chart's total stitches by it, and add finishing time before you promise a date.
- A realtor or closing gift. A small chart, around 70 to 100 stitches wide, in a simple frame, is a realistic scale if you're making several in a year.
- Finishing. A house suits a rectangular frame with a mat. Cross stitching gifts from photos covers timelines and finishing for every occasion, and the house is often the easiest of them.
- Landscapes too. If the house sits in a view that matters, a cottage with hills behind it, landscape cross stitch from a photo covers skies, foliage and distance.
When the photo's ready, open it in the generator and start with the straightening.
Frequently asked questions
How do you make a cross stitch pattern of a house?
Start with a straight-on daylight photo of the front, taken from across the street. Straighten it, crop to the house with a little sky and ground, then turn it into a chart and check the roofline, windows and sky in the preview. Add fine details like window bars, and any lettering, by hand afterwards.
What size should a house cross stitch be?
Big enough that each window is several stitches across. As arithmetic, if a house fills a 150-stitch chart and a window is a tenth of its width, the window gets 15 stitches, enough for a frame and panes. At 70 stitches it gets 7. On 14-count, 150 stitches is about 10.7 inches wide.
Why do the straight lines on my house pattern look jagged?
Because a chart is a grid. Horizontal and vertical lines chart cleanly only if they're level in the photo, so straighten it first. Sloping lines, like most roofs, always become steps of stitches. The Cross Stitch Guild suggests backstitch over individual blocks for outlines, worked after the crosses, to sharpen an edge that matters.
How many colors does a house cross stitch need?
Fewer than a portrait, usually. Walls, roof and windows are large areas of fairly even color, and too many close shades turn a plain wall into scattered single stitches. Start low, raise the count until brick, render and sky stop looking flat, and stop as soon as speckle appears in the plain areas.
Can I use the real estate listing photo?
Not without permission, as a general rule. A listing photo belongs to whoever took it, usually a professional photographer, and turning it into a chart makes a derivative work. The simplest route is to take your own photo from the street, or ask the new owners for one they took themselves.
Can I add the address or family name to the pattern?
Yes, but by hand. Our charts are full cross stitches from the photo and don't generate lettering, so chart the name, number or date on graph paper and stitch it in the bare fabric below the house. Have someone check the spelling before you stitch, and allow extra fabric for it when you cut.
Sources
- The Cross Stitch Guild — Away waste knot start and backstitch outlining (one strand, smaller needle, after the crosses, over individual blocks, avoid long stitches)
- DMC — Use back stitch to accentuate your cross stitch (after the crosses, darker shades rather than black, tension)
- DMC — What fabric should I use? (count is the number of stitches in an inch)
Keep stitching
 Guides
Cross Stitch Gifts From Photos: Ideas and Start Dates
Photo cross stitch gift ideas by occasion, with the arithmetic to work out when to start: chart size, your stitching pace, hours a week and finishing time.
Read · 15 min Technique
Backstitch in Cross Stitch: Outlines for Photo Patterns
How to backstitch in cross stitch, and when photo patterns need it: whiskers, eyes, lettering and fine lines, planned on paper and added after the crosses.
Read · 10 min Guides
Cross Stitch Frame Sizes: Stitch Counts for 5x7 to 16x20
How many stitches fit a 5x7, 8x10, 11x14 or 16x20 frame on 11 to 18-count Aida, with the frame lip, mats and the fabric to cut worked out.
Read · 12 min Guides
Quick Cross Stitch Gifts You Can Finish in a Weekend
Small cross stitch gifts that fit a weekend: a card, an ornament, a bookmark, a tote. The stitch budget for your pace and the chart size that fits it.
Read · 8 min Guides
Baby Birth Sampler Cross Stitch: Name, Date, Photo
Plan a birth sampler around a photo: what to include, how many rows lettering takes, charting the name by hand, and what to stitch before the birth.
Read · 11 min Guides
Personalized Christmas Stocking Cross Stitch: Names
Cross stitch a name and a small photo motif onto a Christmas stocking: Aida band sizes, waste canvas on a ready-made cuff, letter sizing, start-by plan.
Read · 10 min